Flashing Arduino Nano Bootloader from Arduino Uno
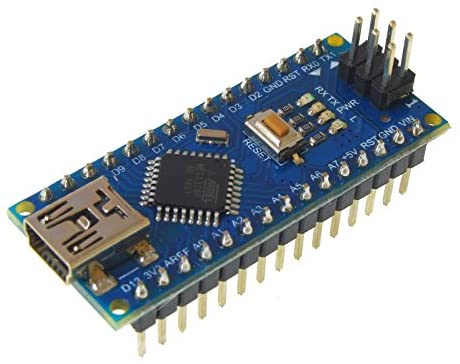
Arduino Bootloader - How-To (Re)Install the Aruduino Nano Bootloader
How to flash the Aruduino Nano bootloader and what to do if it doesn't work.
I recently obtained an Arduino Nano unit from my Dad ( he's 82 and loves playing with gadgets and electronics! ) and decided to have a play with it but I found it wouldn't take a sketch, it refused to accept the upload of sketch code. Turns out cheaper non-genunine Arduino boards are sometimes shipped without bootloaders. Sounds like a serious issue but not at all, the designers of the Arduino system thought about this.
What is the Arduino bootloader?
The Arduino bootloader is a small piece of code, as the name suggests, that allows the compiled sketch code to be installed and started. It's 512 bytes in size and sits in an area of "memory" within the 328P microprocessor chip.
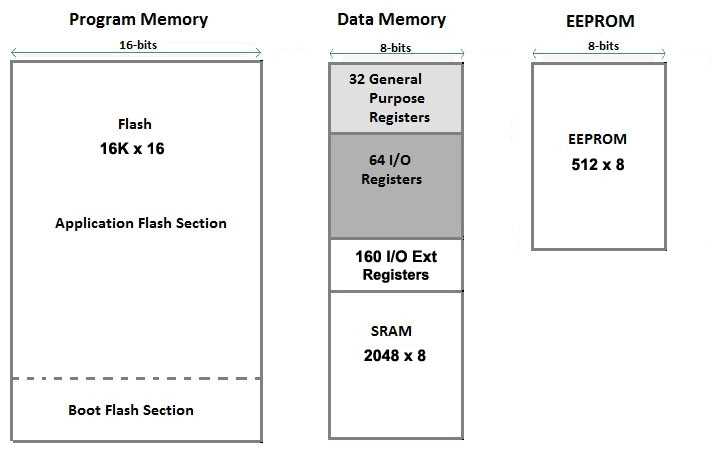
Believe it or not, there's actually not a lot to an Arduino board and you can simply buy an ATmega328P microprocessor chip and flush a bootloader to it if you wish! The Arduino system is mainly about the supporting boards that hold the processor chips, the processor chips on the boards are, well, cheap as chips!
A special piece of code that is executed at every reset of the microcontroller and that looks for a sketch to be uploaded from the serial/USB port using a specific protocol and speed. If no connection is detected, the execution is passed to the code of your sketch. This little (usually 512 bytes) piece of code is called the "Bootloader" and it is in an area of the memory of the microcontroller - at the end of the address space - that can't be reprogrammed as a regular sketch and had been designed for such purpose.
Use an Arduino Uno to ReProgram An Arduino Nano
So you'll need the following:
- Working Arduino Uno board
- Arduino Nano board
- Jumper wires with pins
- 10uF Capacitor ( must be 10uF )
- Breadboard if you have one
First you need to do is to flash a specific sketch, supplied from within the standard Arduino IDE, to the Arduino Uno.
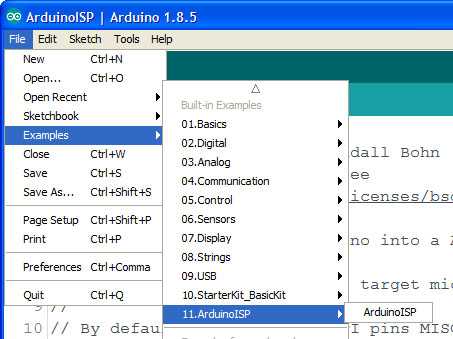
Plugin the Arduino Uno and from the Examples menu locate the "ArduinoISP" sketch, upload it to the Arduino Uno.
Disconnect the Uno from the USB and wire it up as shown below. Note the use of the capacitor slotted into the line to GND.
Most boot flashing tutorials and diagrams will simply show the GND being wired up between the two board but note that if you attempt to flash the bootloader with just the lines you may find it will fail. The line is hot and when you go to flash the target board needs its reset line hit and dropped, if the line is simply hot the reset not happen and the reprogram will fail. The capacitor is put in line to drop the voltage and pull the line back up when the flash is started this triggers the Uno to Nano reset and the Nano will be open to accept the boot flash. It needs to be 10uF anthing bigger or smaller will take too long to pull the reset.
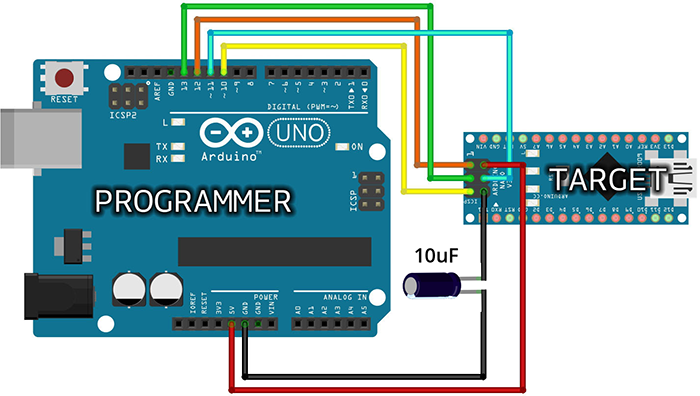
Once you have this wired up as shown the next step is to flip the Arduino IDE into a programmer using the Uno as the hardware programmer passing through to the Nano.
Plug the USB into the Arduino UNO board NOT the Nano, the Uno is a programmer and will instruct the Nano.
- You need the board set to the target, the Nano.
- You need the chip set to ATMega328P. ( pre 2018 this would be "old bootloader" )
- Port is set to the Uno's USB link.
- Select "Arduino as ISP" from the Programmer options.
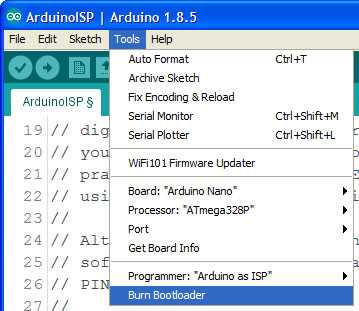
Finally hit Burn Bootloader.
What Happens if it Doesn't Work?
One issue I had with my Nano board was that it would not take the bootloader when I first tried and I kept getting failures. It took me 2 days to find the proble,.
If you see this:
1avrdude: stk500_recv(): programmer is not responding
2avrdude: stk500_getsync() attempt 1 of 10: not in sync: resp=0x03
You may see this:
1avrdude: Yikes!  Invalid device signature.
2         Double check connections and try again, or use -F to override
3         this check.
4
5Error while burning bootloader.
I was also seeing random signatures from the Nano board!
1Reading | ################################################## | 100% 0.05s
2
3     avrdude: Device signature = 0x000000
4     avrdude: Yikes!  Invalid device signature.
5     Double check connections and try again, or use -F to override
6     this check.
All these errors mean one thing, you have bad wiring! The lines between the boards must be good and you will need to ensure the cap in the GND line is good.
It turned out in my case that the VCC pin on my Nano board had a bad solder joint and it was joined to the pin next door to it. This meant the second it was flashed the VCC bled over and reset the board and kept producing random signatures. 5 secs with the soldering iron to clean up the bad solder joint and the flash worked perfect.
Moral of the Story
Genuine Arduino boards will have a higher quality check from the factory but clones may not be subject to quite such high standards. You can get 5 Nano boards for £10 from Amazon, well worth buying the clone boards as they're far cheaper than the genuine boards, but just be sure that your ready to check them over and you're ready to dig deeper into the Arduino guts when things don't work out of the box.